CentOS Stream 8 - Installation instructions
Before you start
-
Check that your machine is properly registered (in case it is on the CERN network)
-
Check that CERN Domain Name Service is updated for your machine (in case it is in the CERN network):
host yourmachine command should return an answer.
-
Check that your machine meets minimum system requirements
-
Memory: Minimum 2 GB (system will run with 1 GB but performance will be affected)
-
Disk space: 10 GB (including 1 GB user data) for default setup ( 1 GB for minimal setup)
-
Please see Network/PXE installation procedure at: Linux Installation, IF YOU USE it you may skip following points up to the system installation.
-
Prepare boot media (you will need a single recordable CD or USB memory key). (Check the boot media preparation page for instructions how to prepare (and check) your boot media.)
-
Available boot media - boot CD/USB image http://linuxsoft.cern.ch/cern/centos/s8/BaseOS/x86_64/os/images/boot.iso (CentOS Stream 8)
-
Installation method - http: http://linuxsoft.cern.ch/cern/centos/s8/BaseOS/x86_64/os (CentOS Stream 8)
-
Note: use CD/USB image installation method ONLY if Network/PXE installation is not possible.
System installation
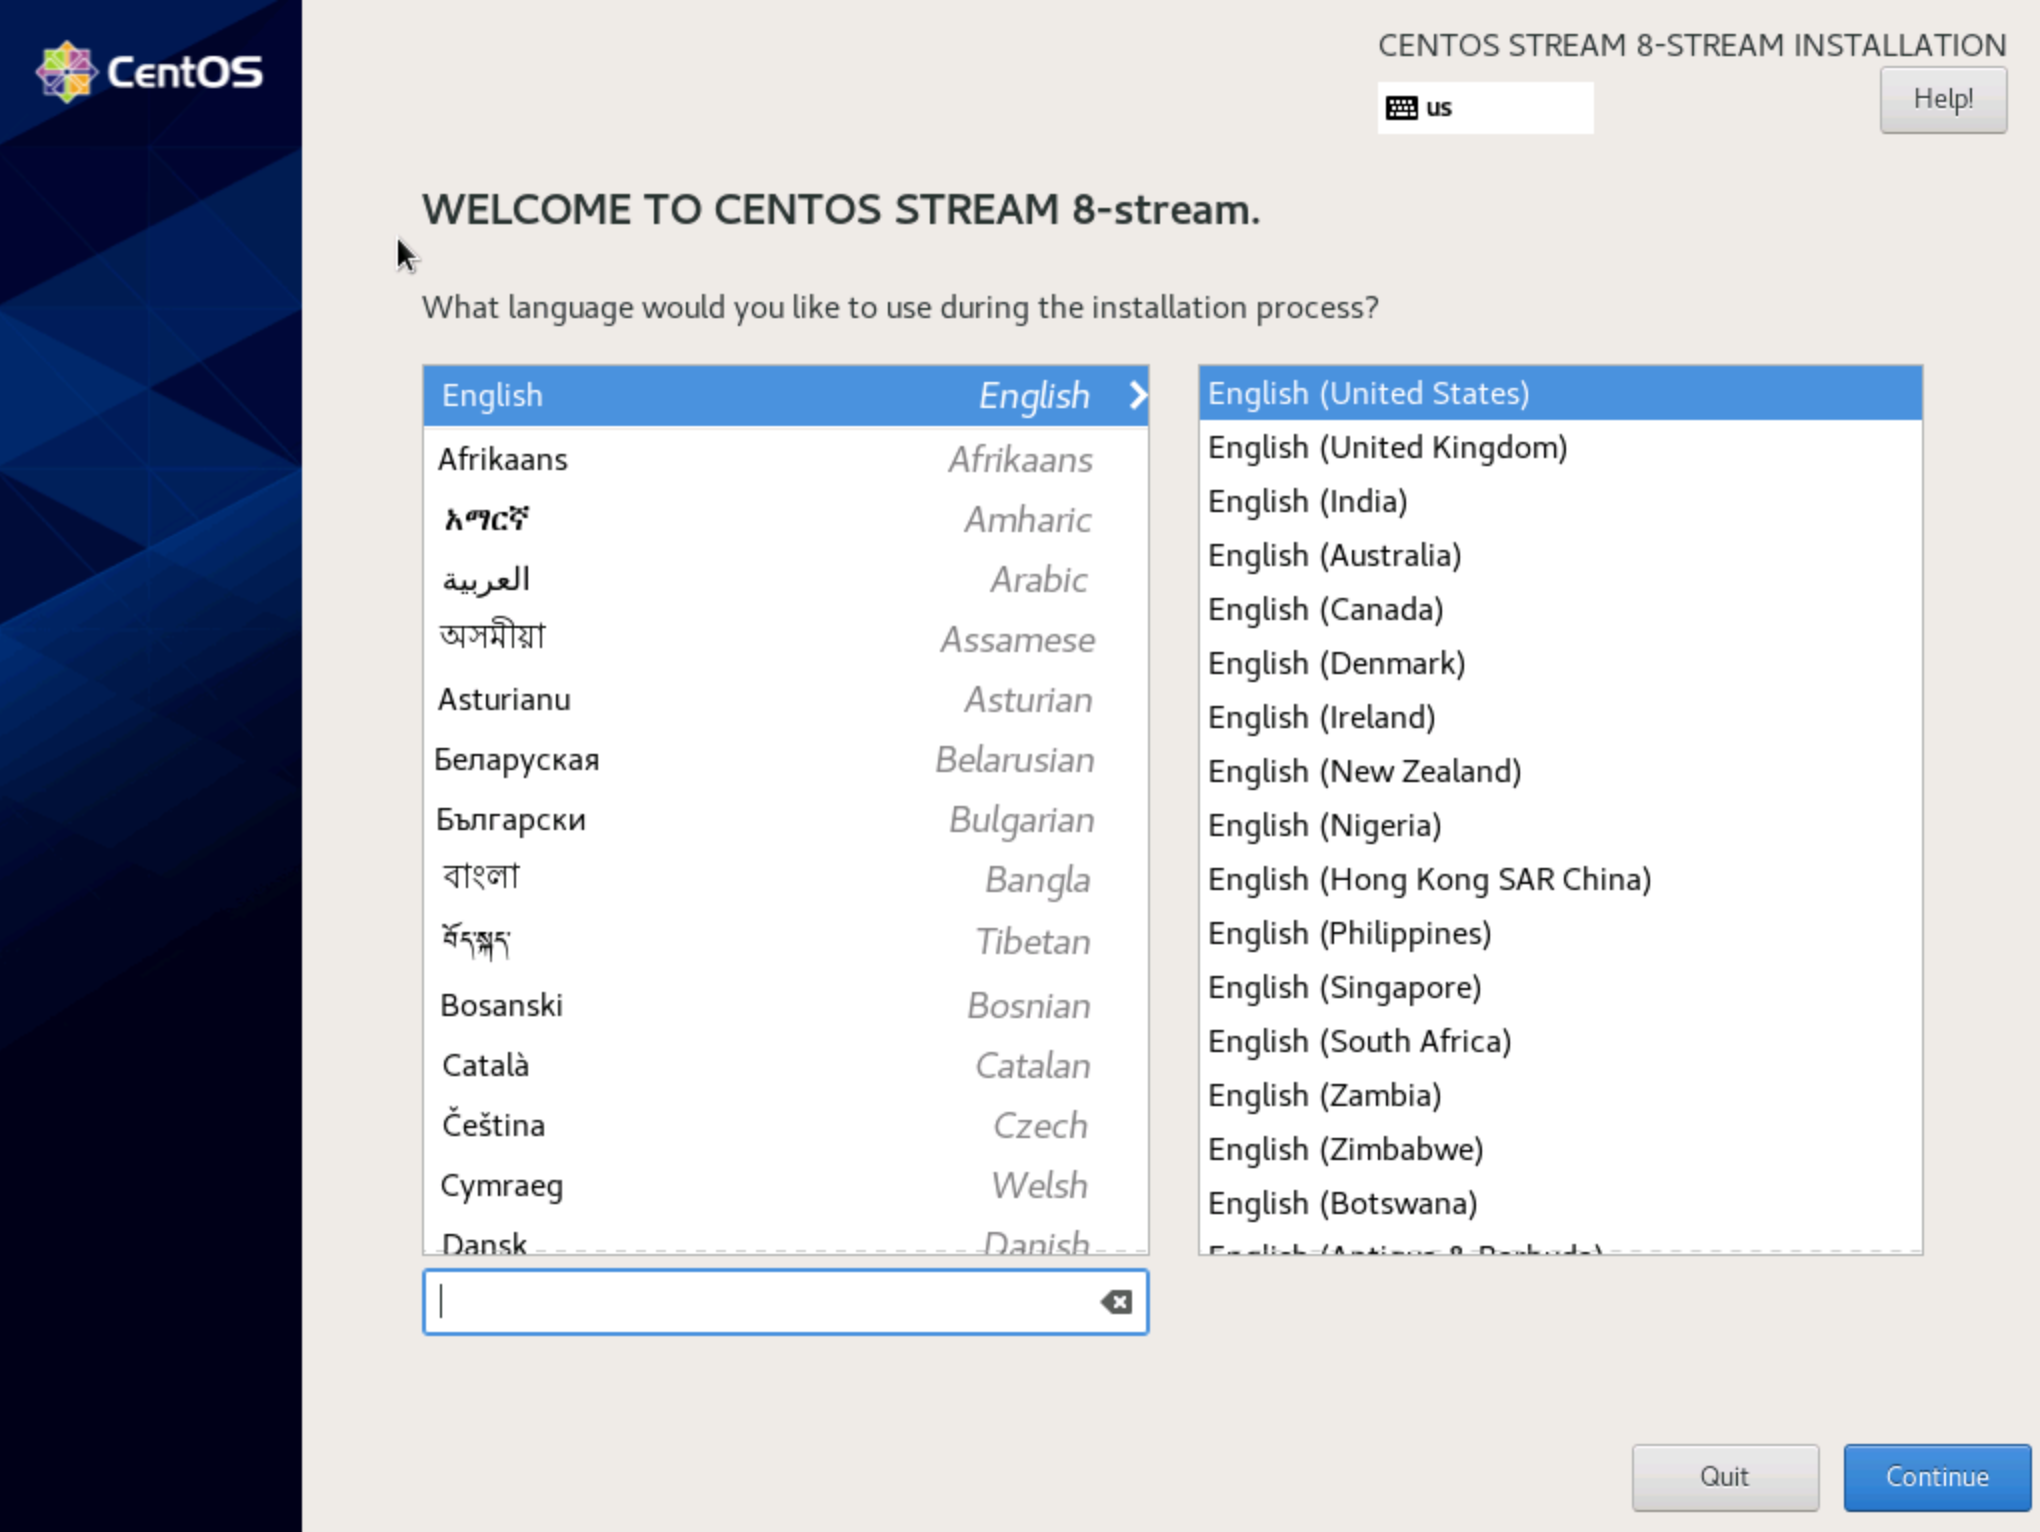
Installation language and keyboard selection:
You will need to provide input for the items marked in red, 'Keyboard', 'Time & Date', 'Software Selection', 'Installation Destination'. It's best to start with 'Installation Destination'

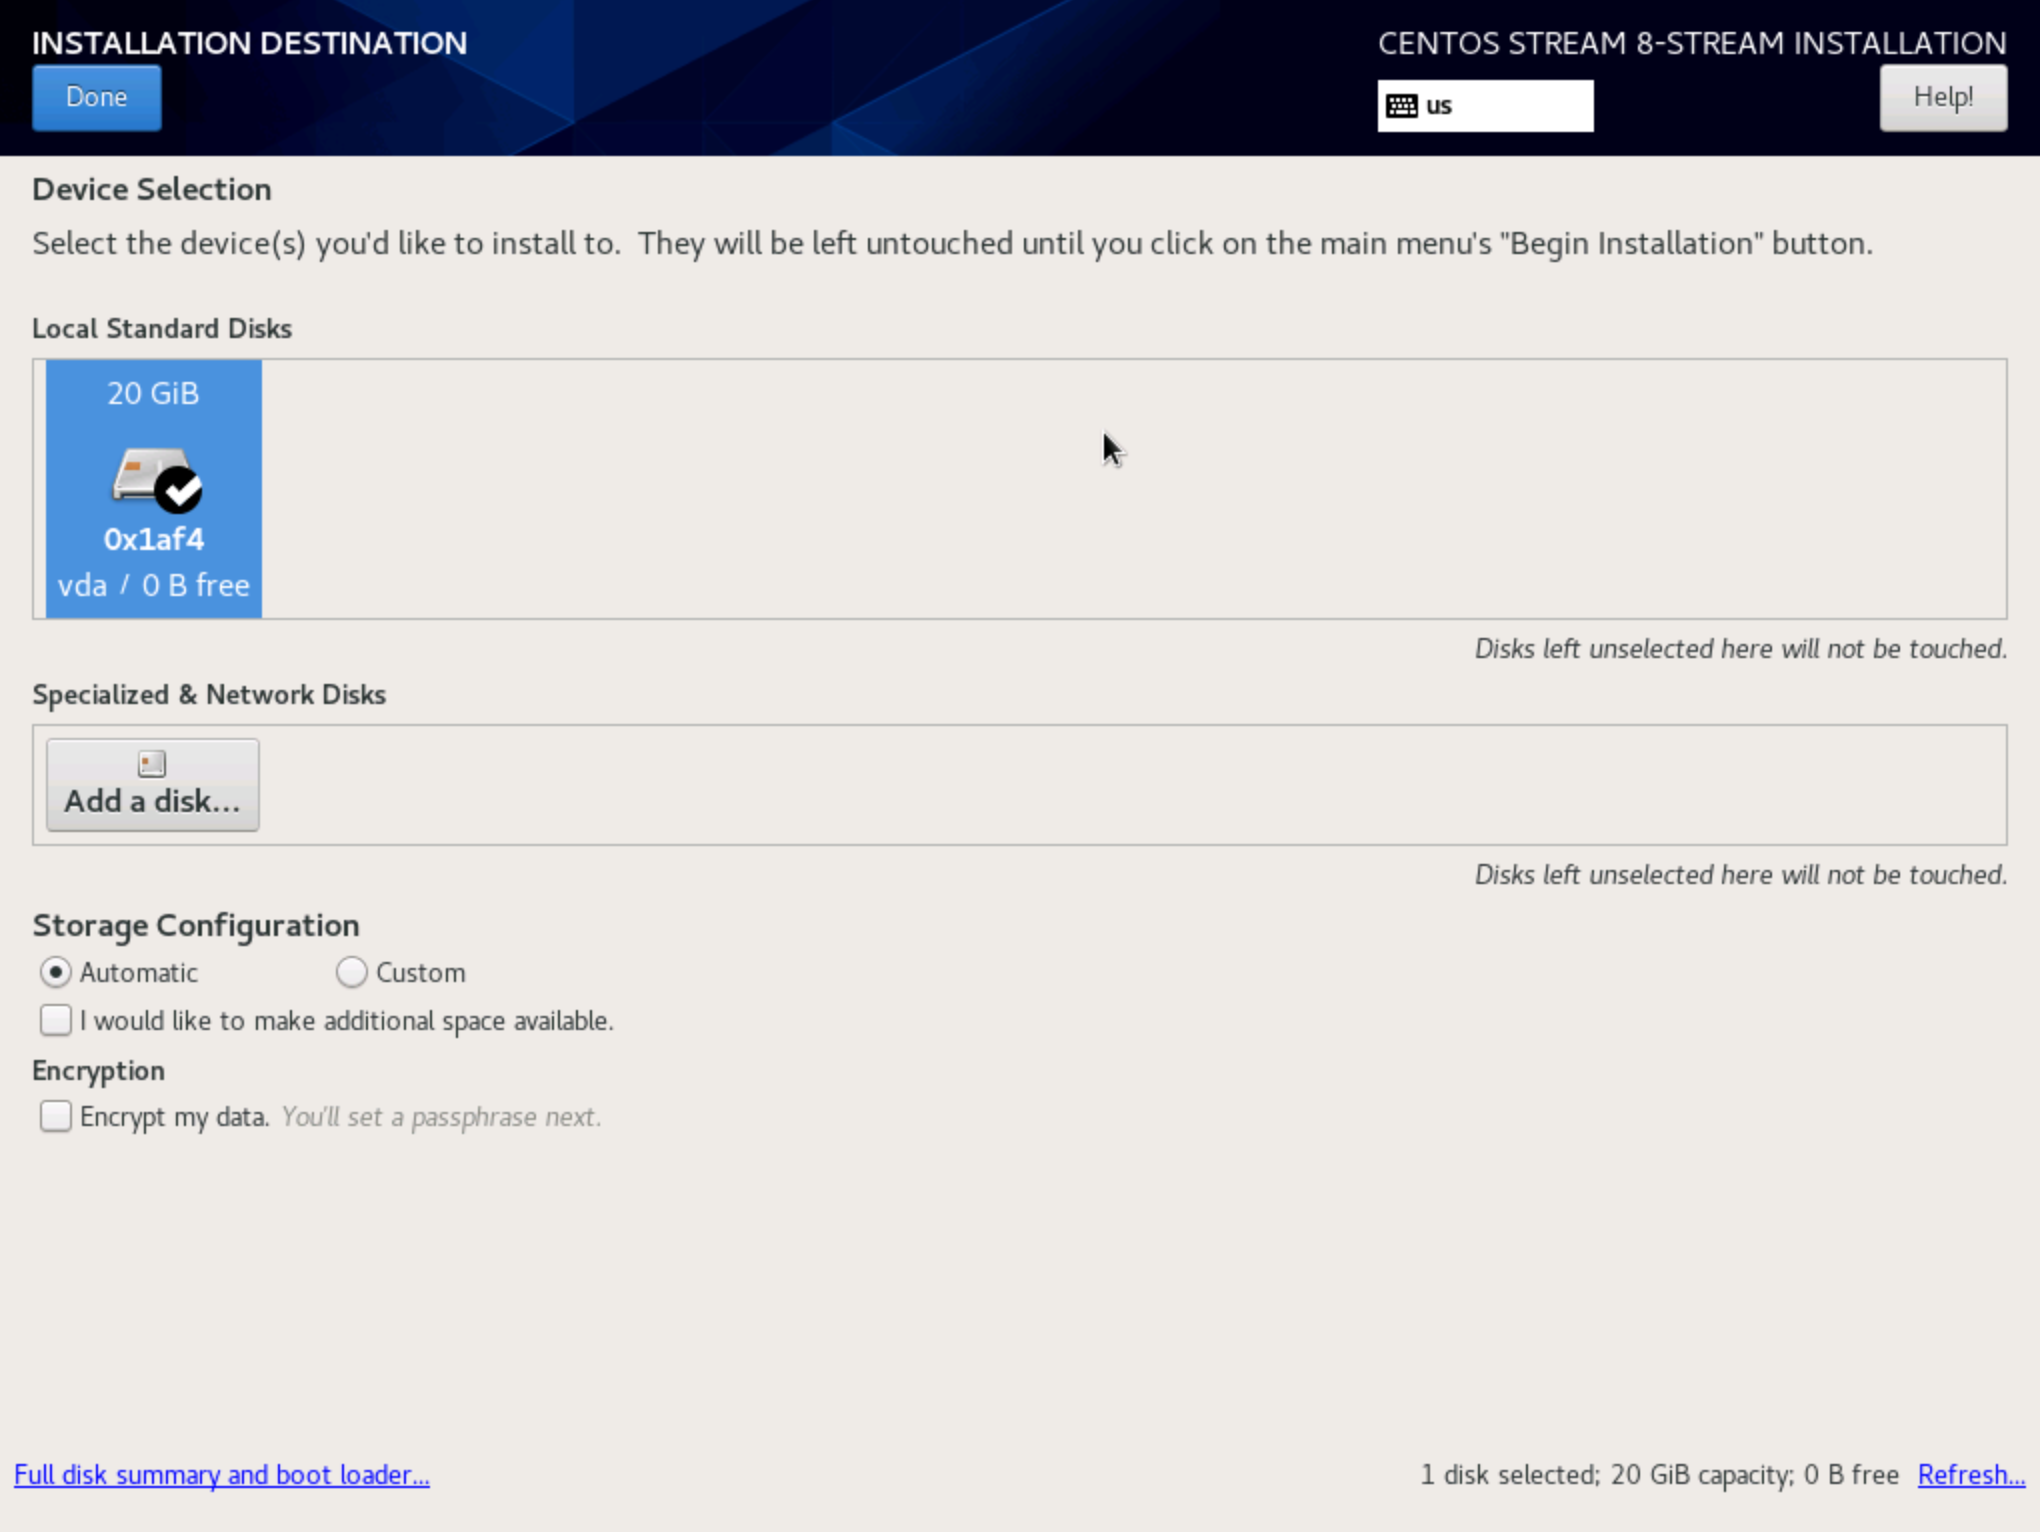
Select the device to be used for the installation:
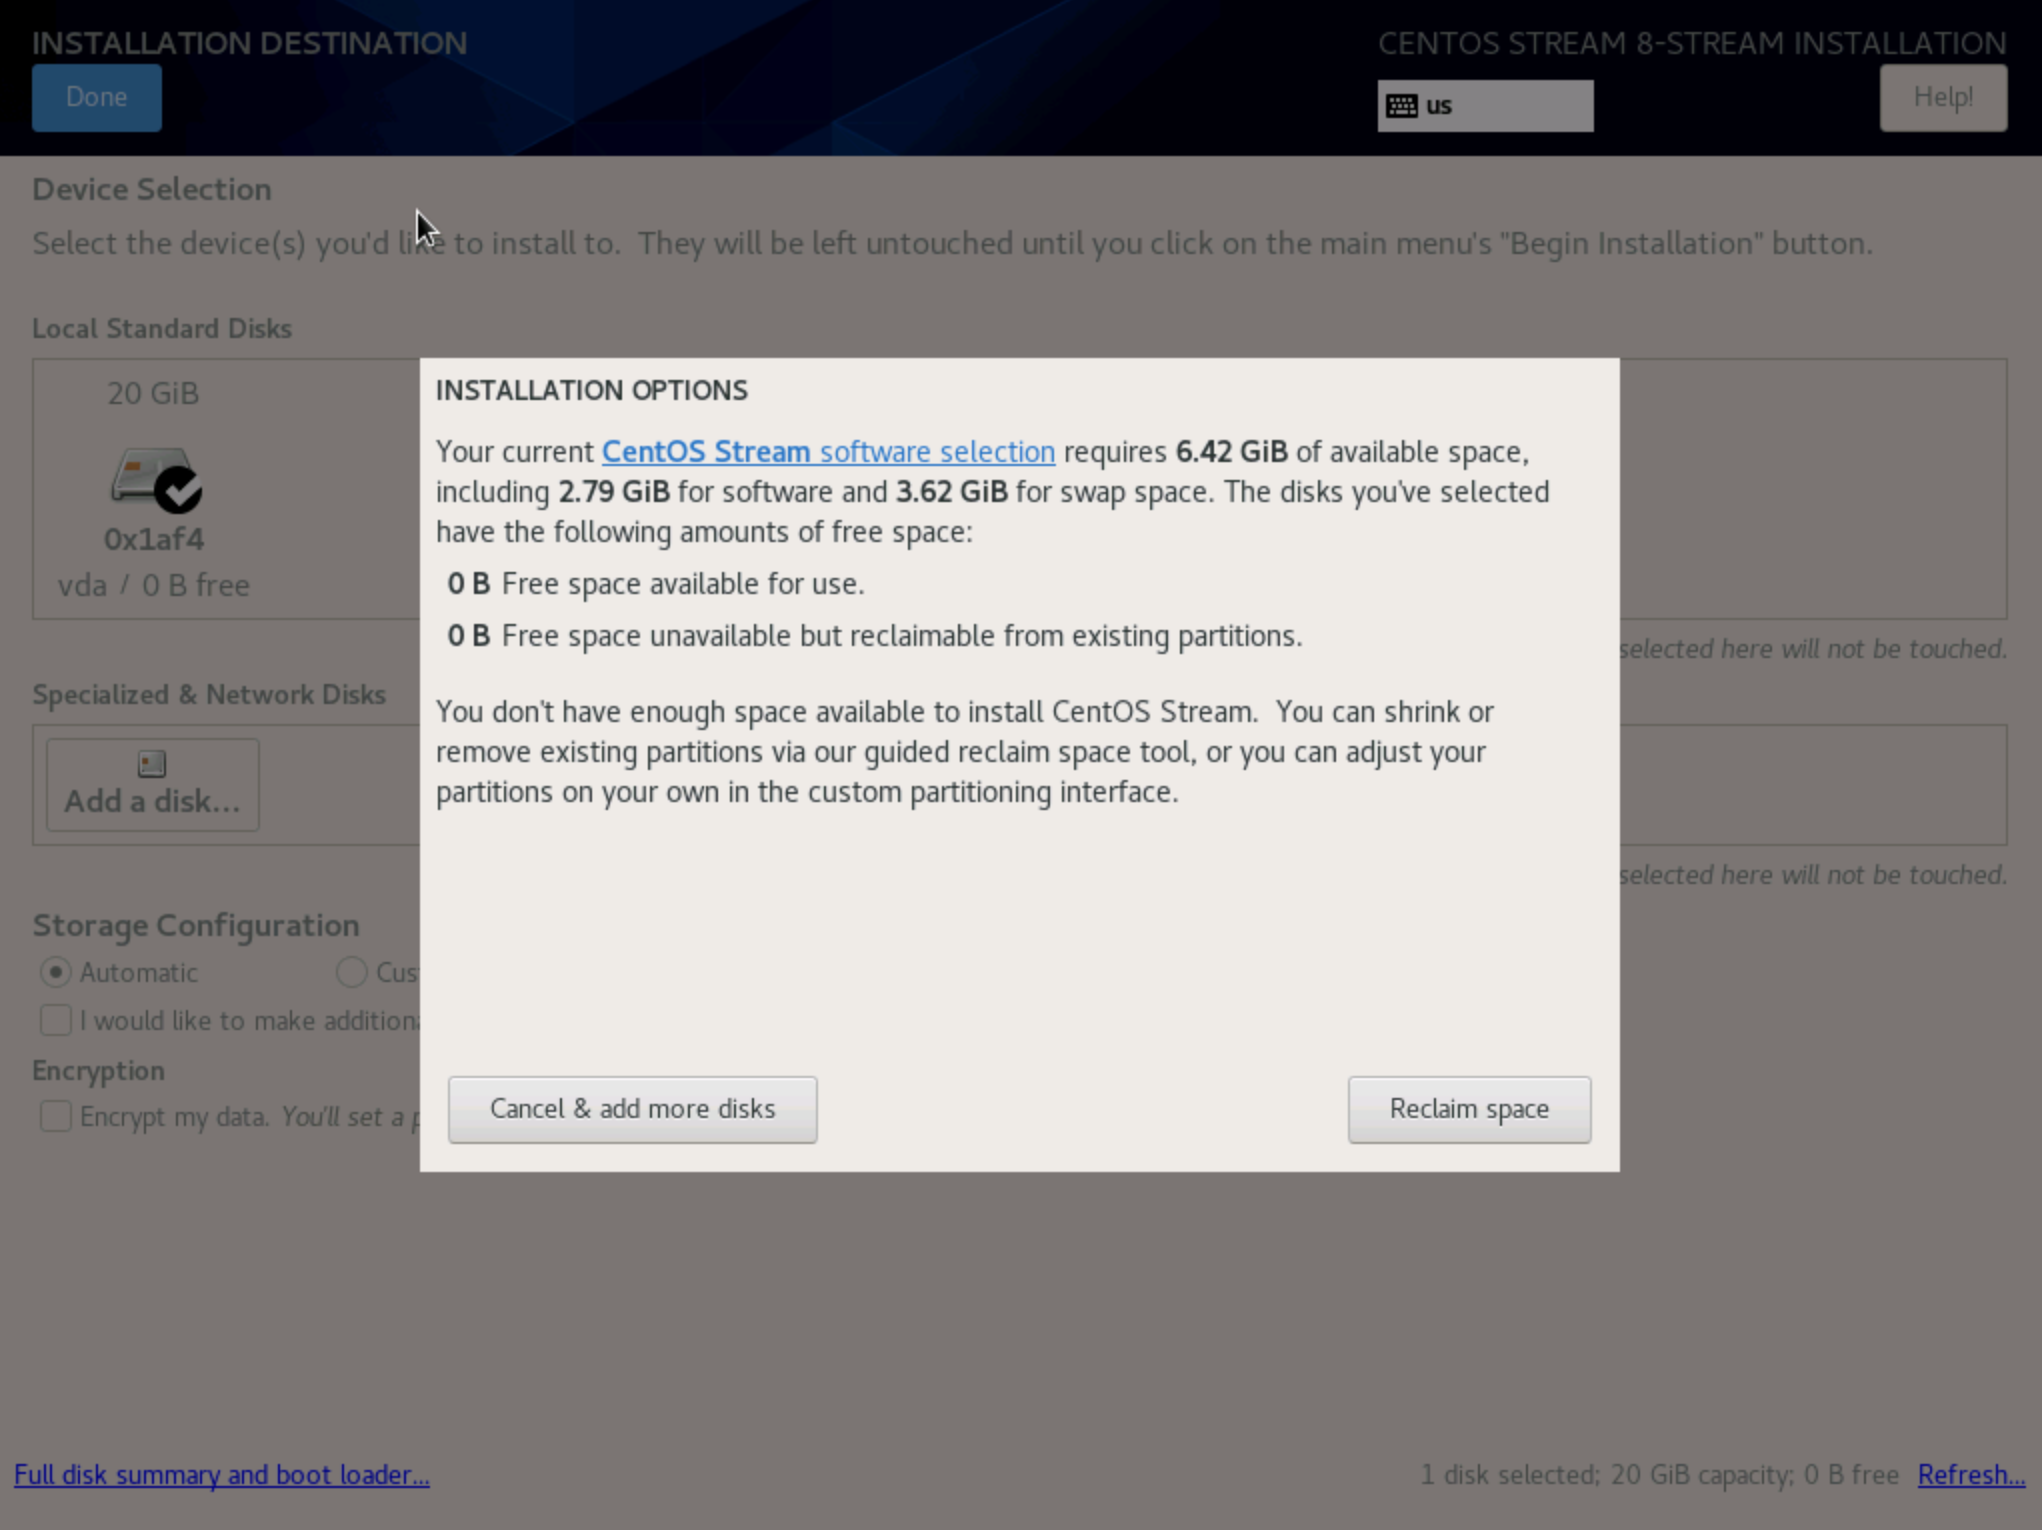
If selected device has been already used for previous version of operating system use 'Reclaim space':
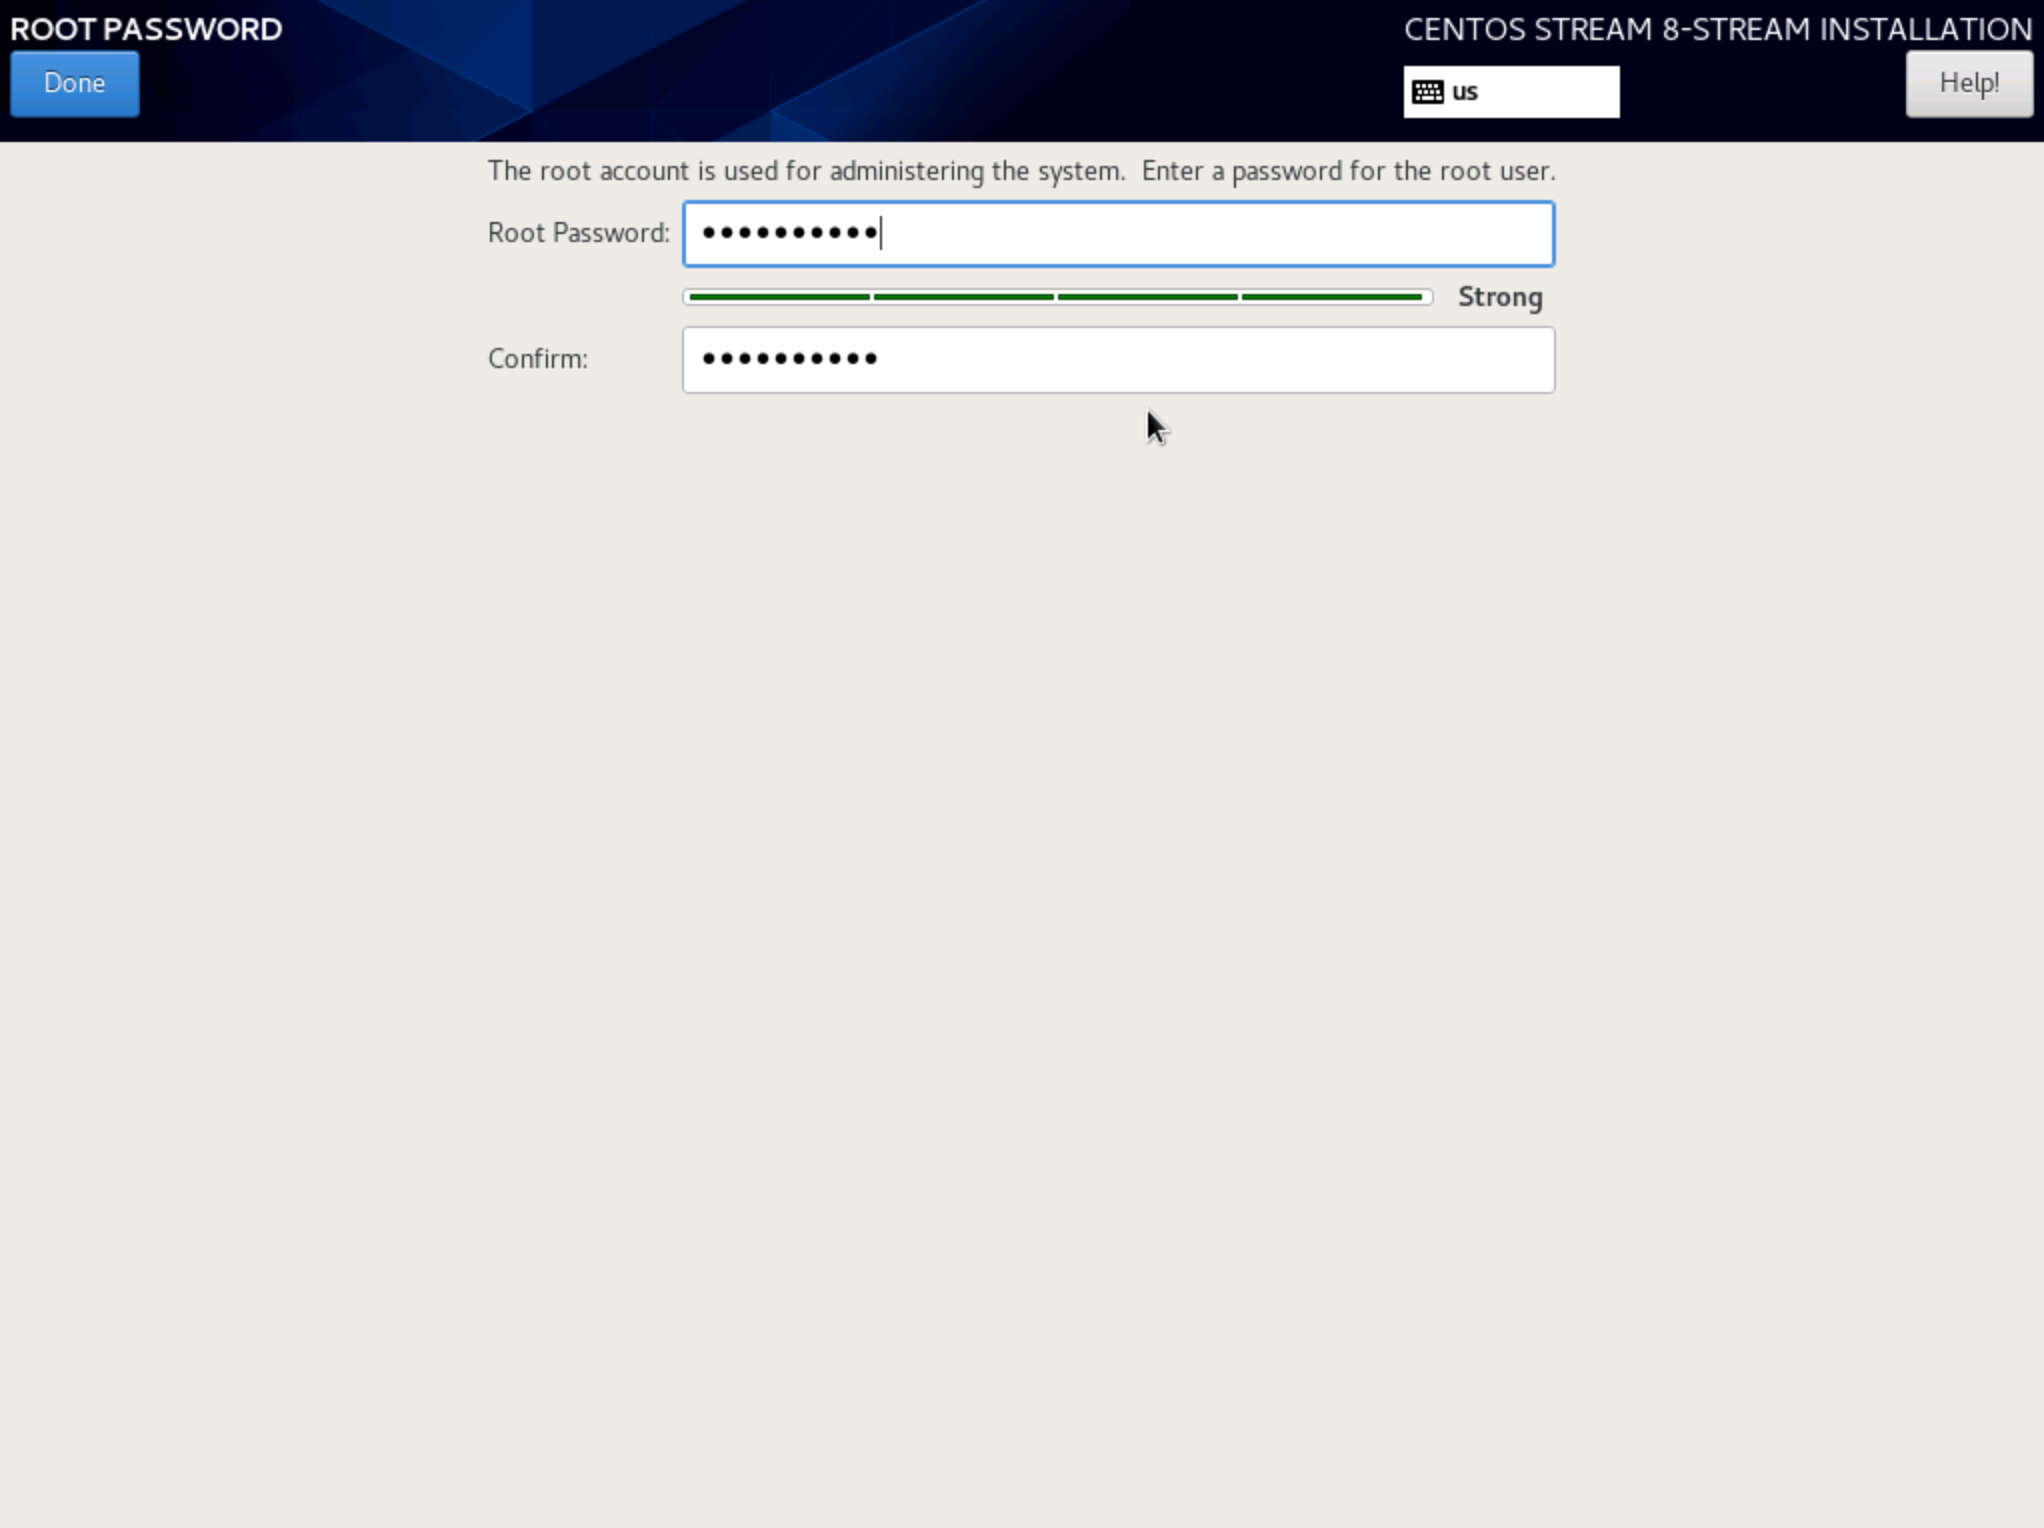
Set the 'root' (administrative account) password.
Select the software to install. Choose 'Software Development Workstation (CERN Recommended Setup)'
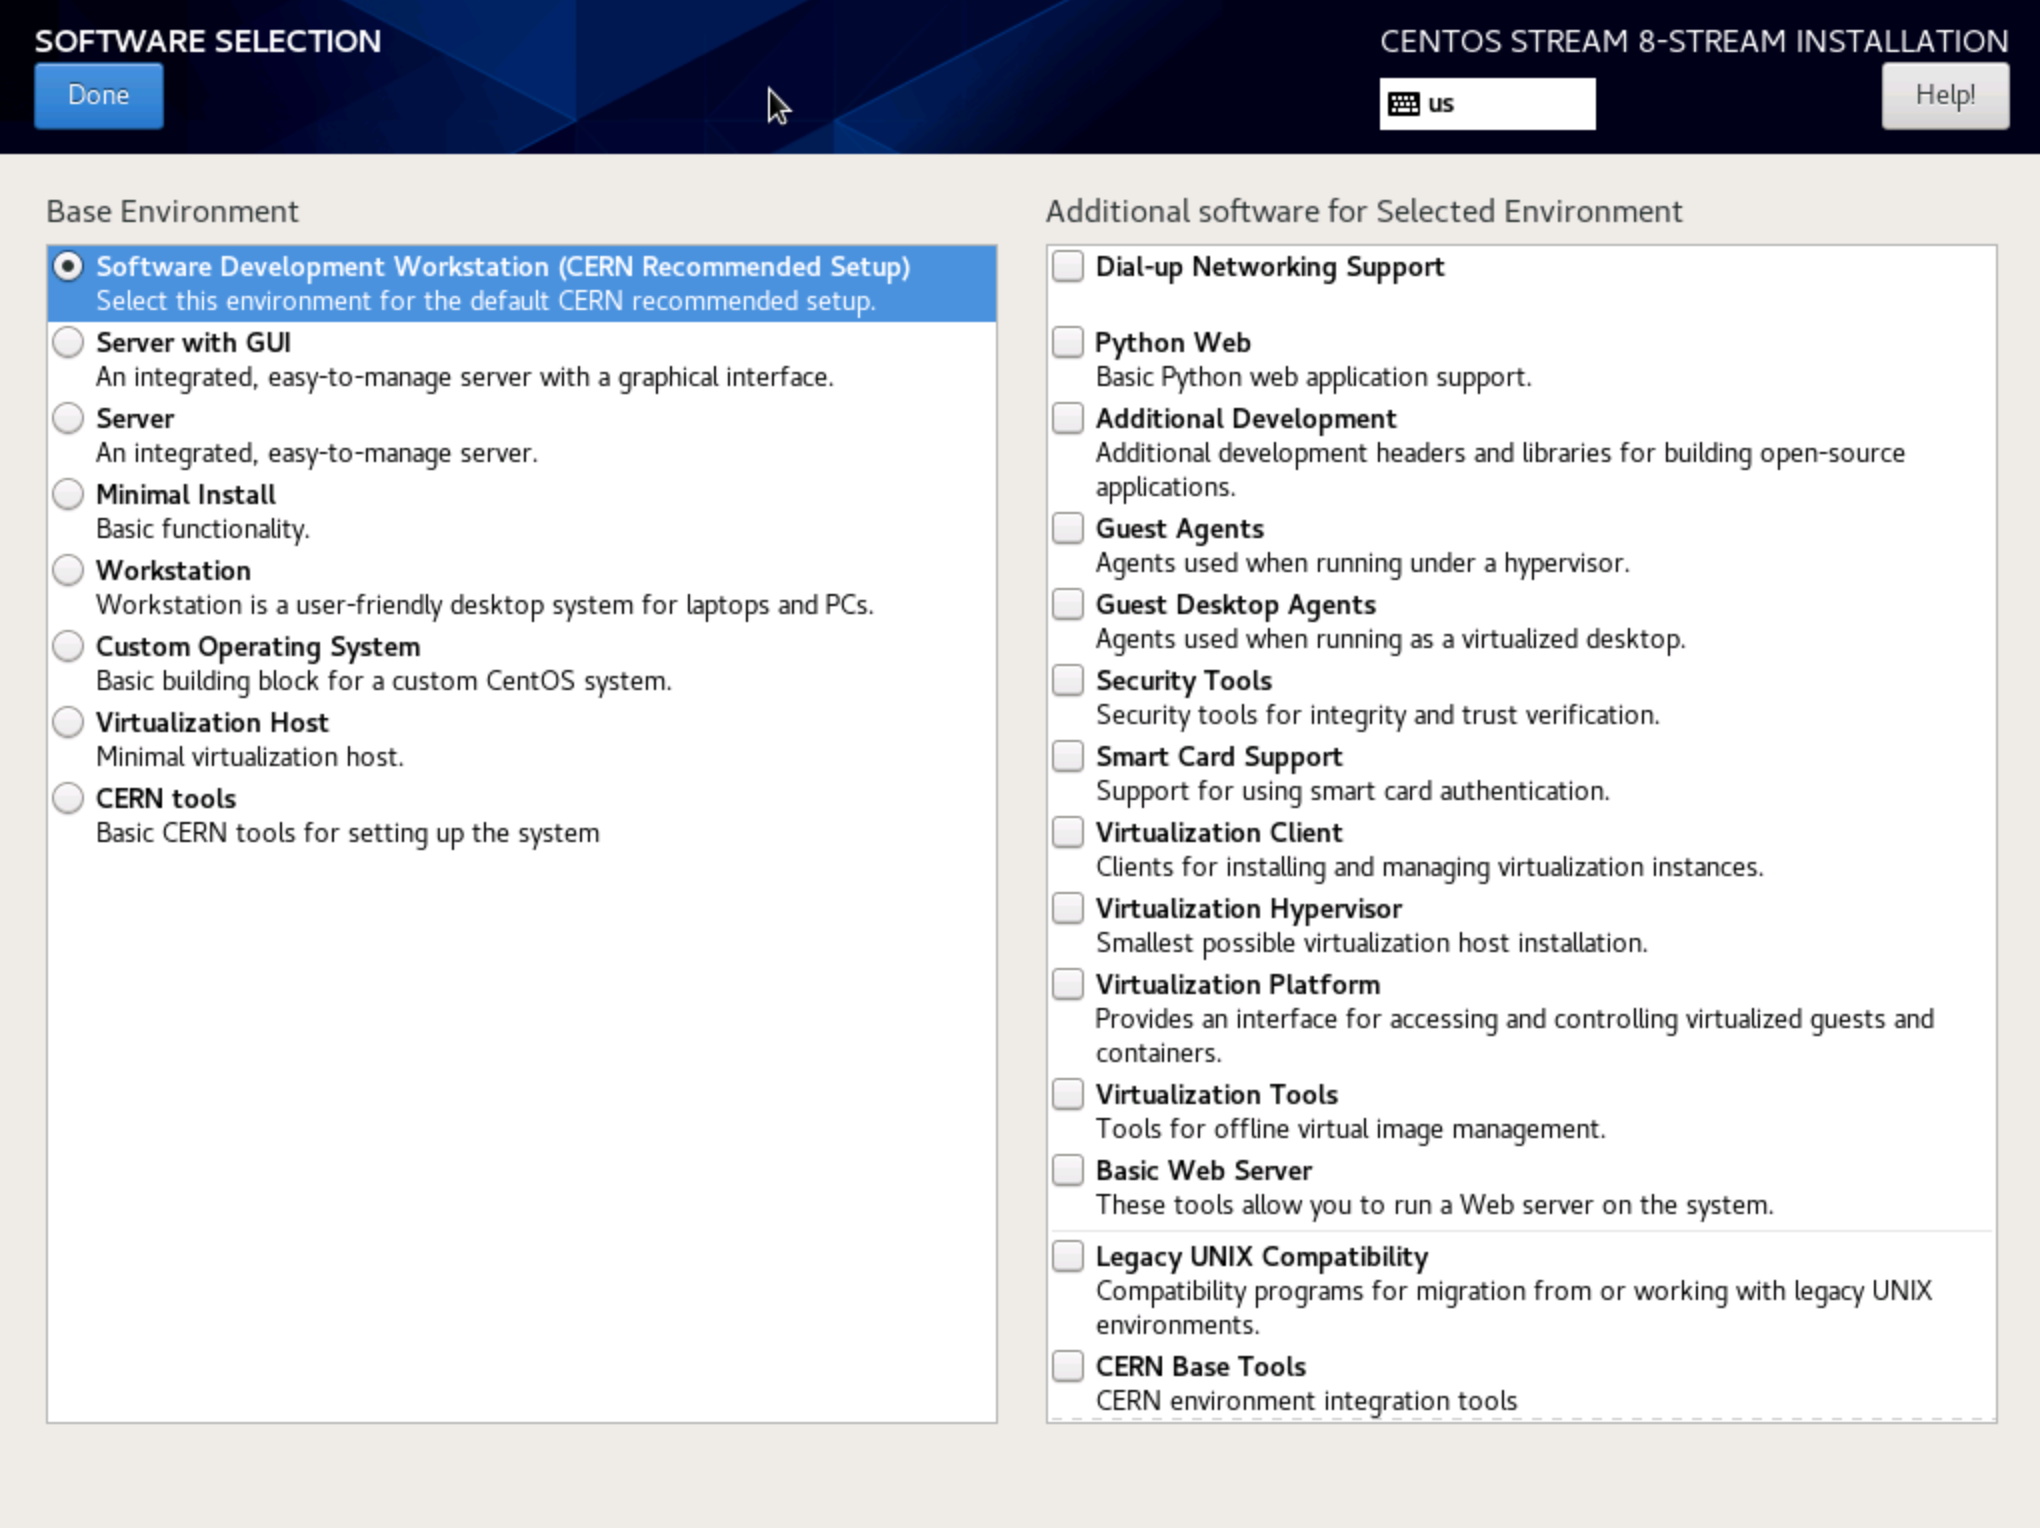
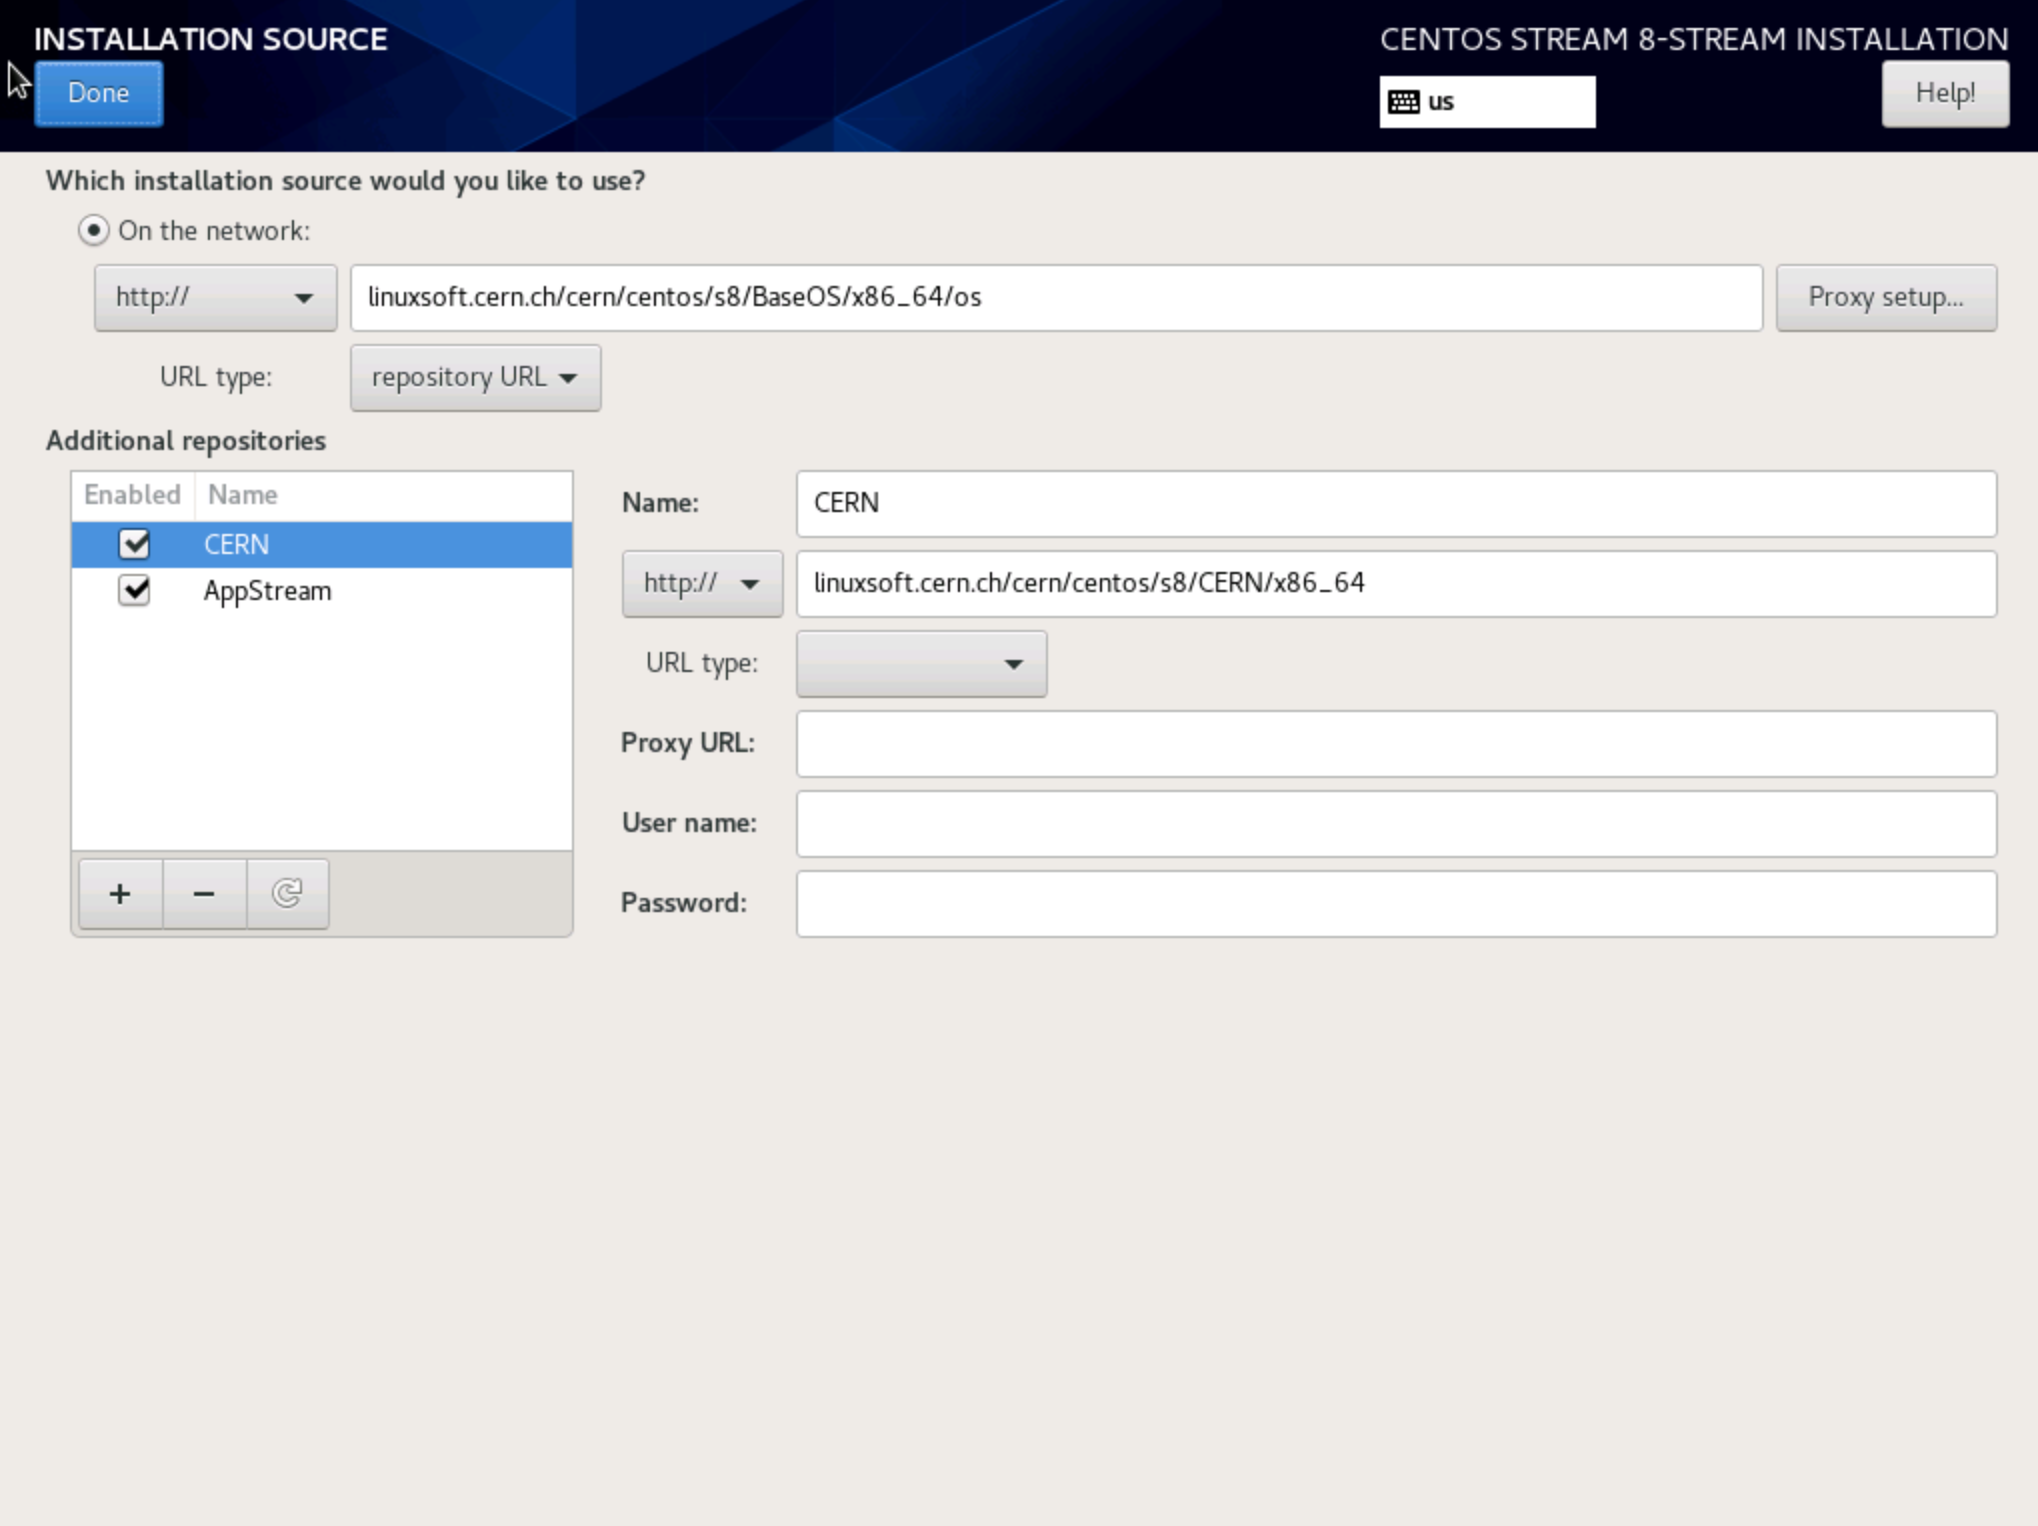
If you do NOT see 'Software Development Workstation (CERN Recommended Setup), you may need to add the CERN repository to the installation. You can do by clicking 'Installation Source' and referring to the following screen shot
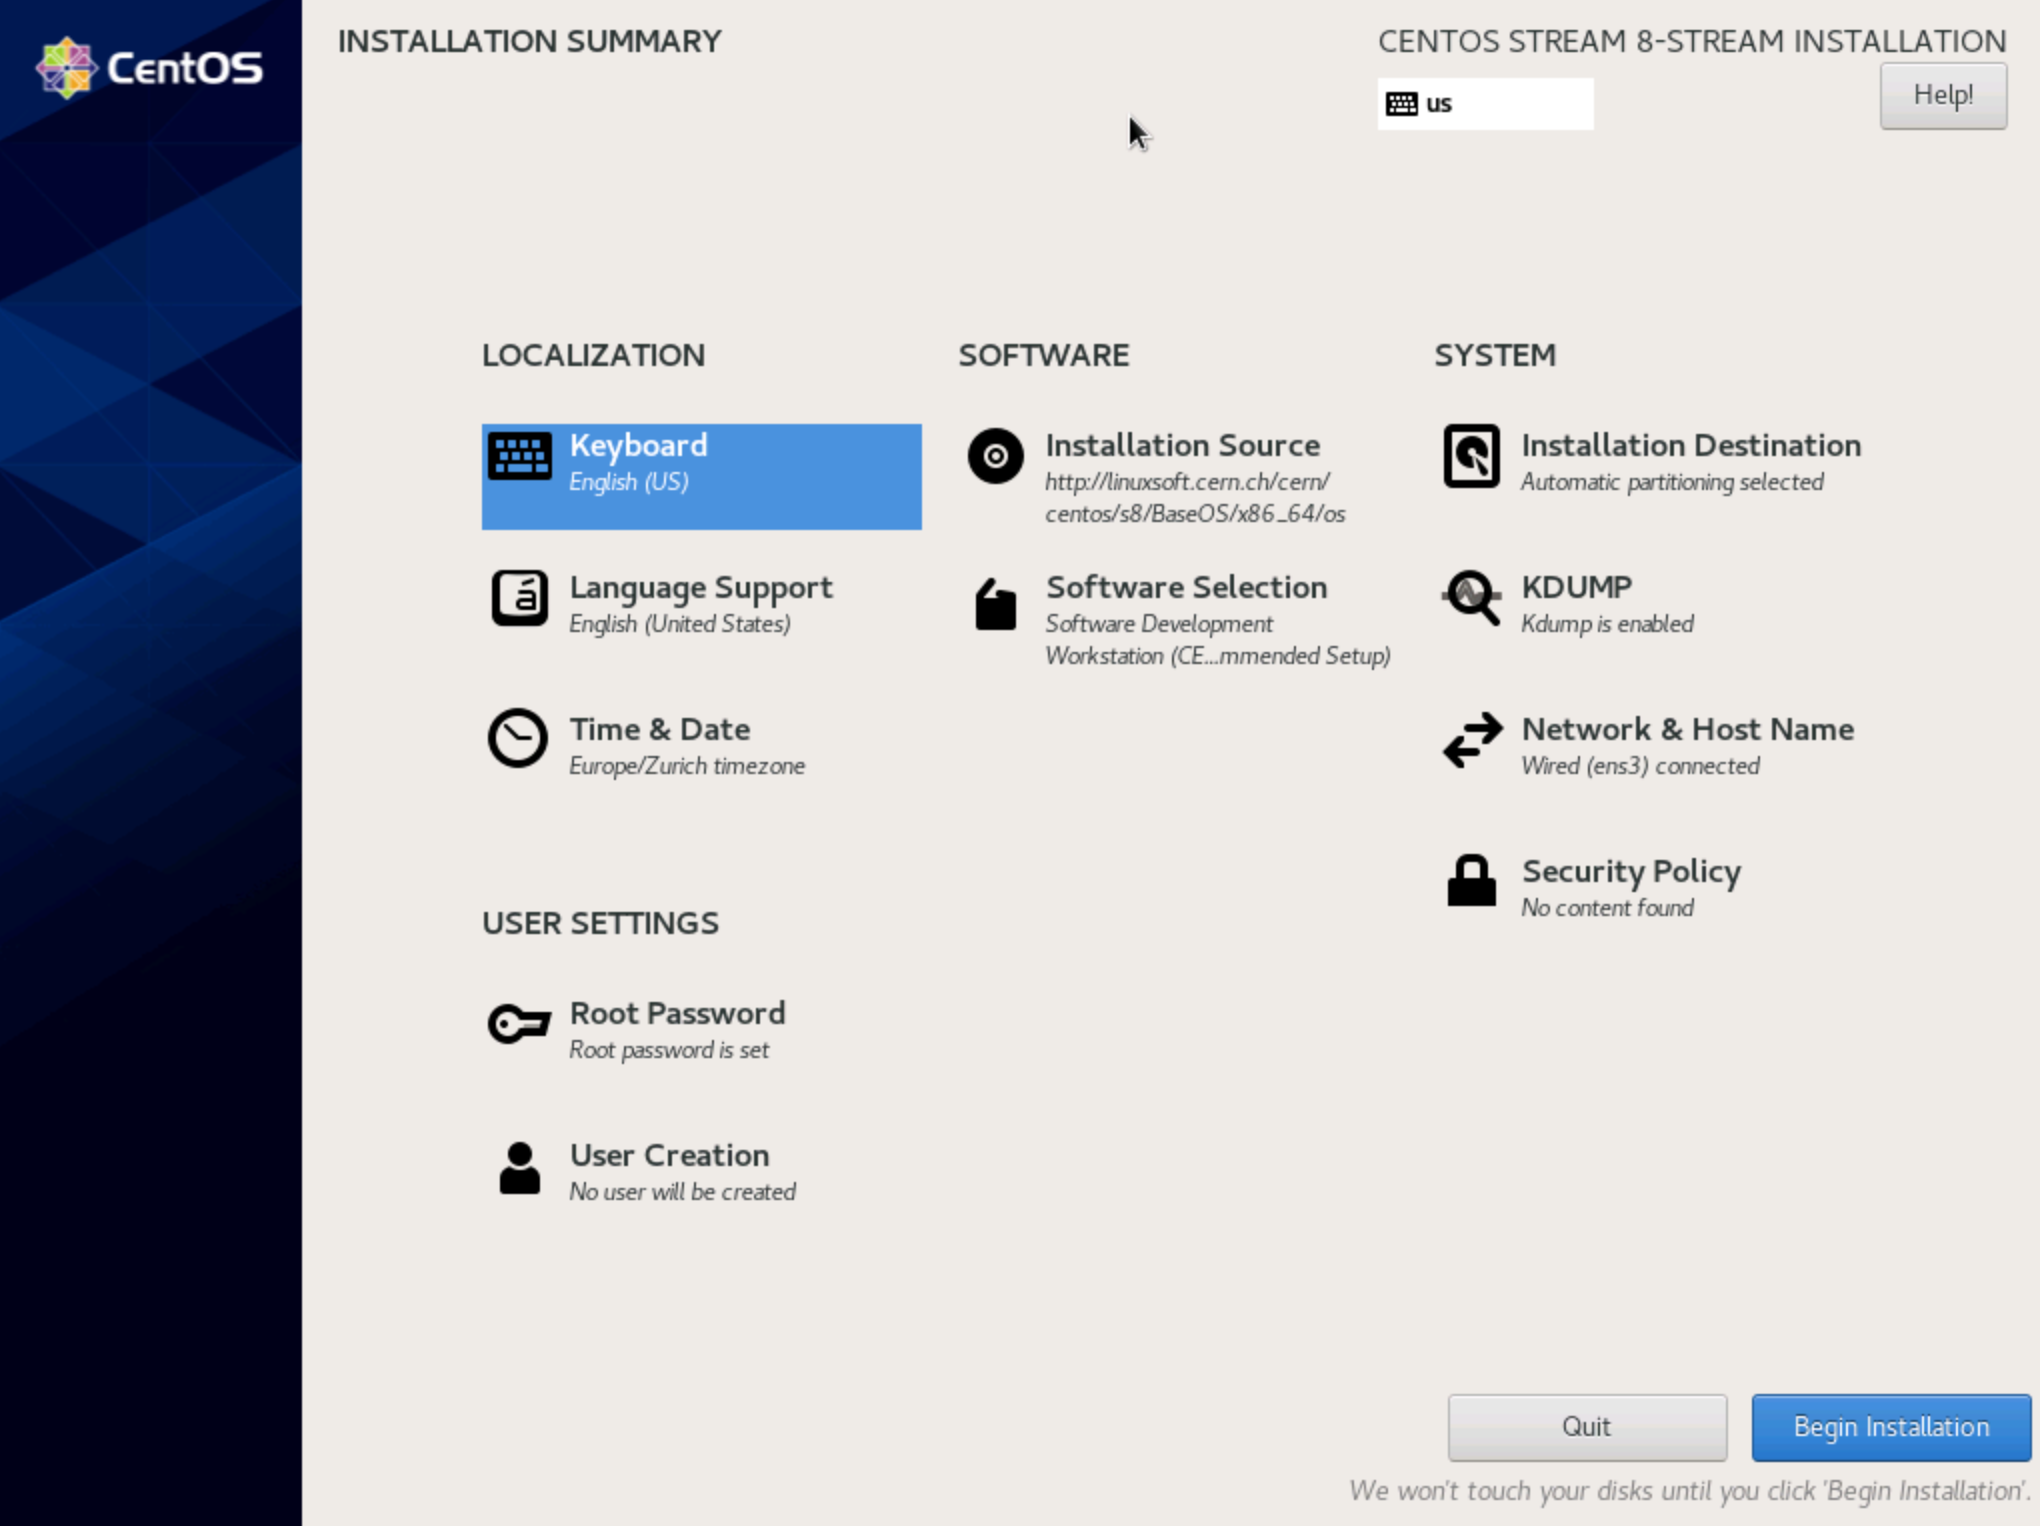
Your screen should now have no more items in 'red', and should look similar to this: Select 'Begin installation':
Automatic CERN site specific configuration
After the successful installation, if you have selected 'Software Development Workstation (CERN Recommended Setup)' the initial configuration screen will be displayed
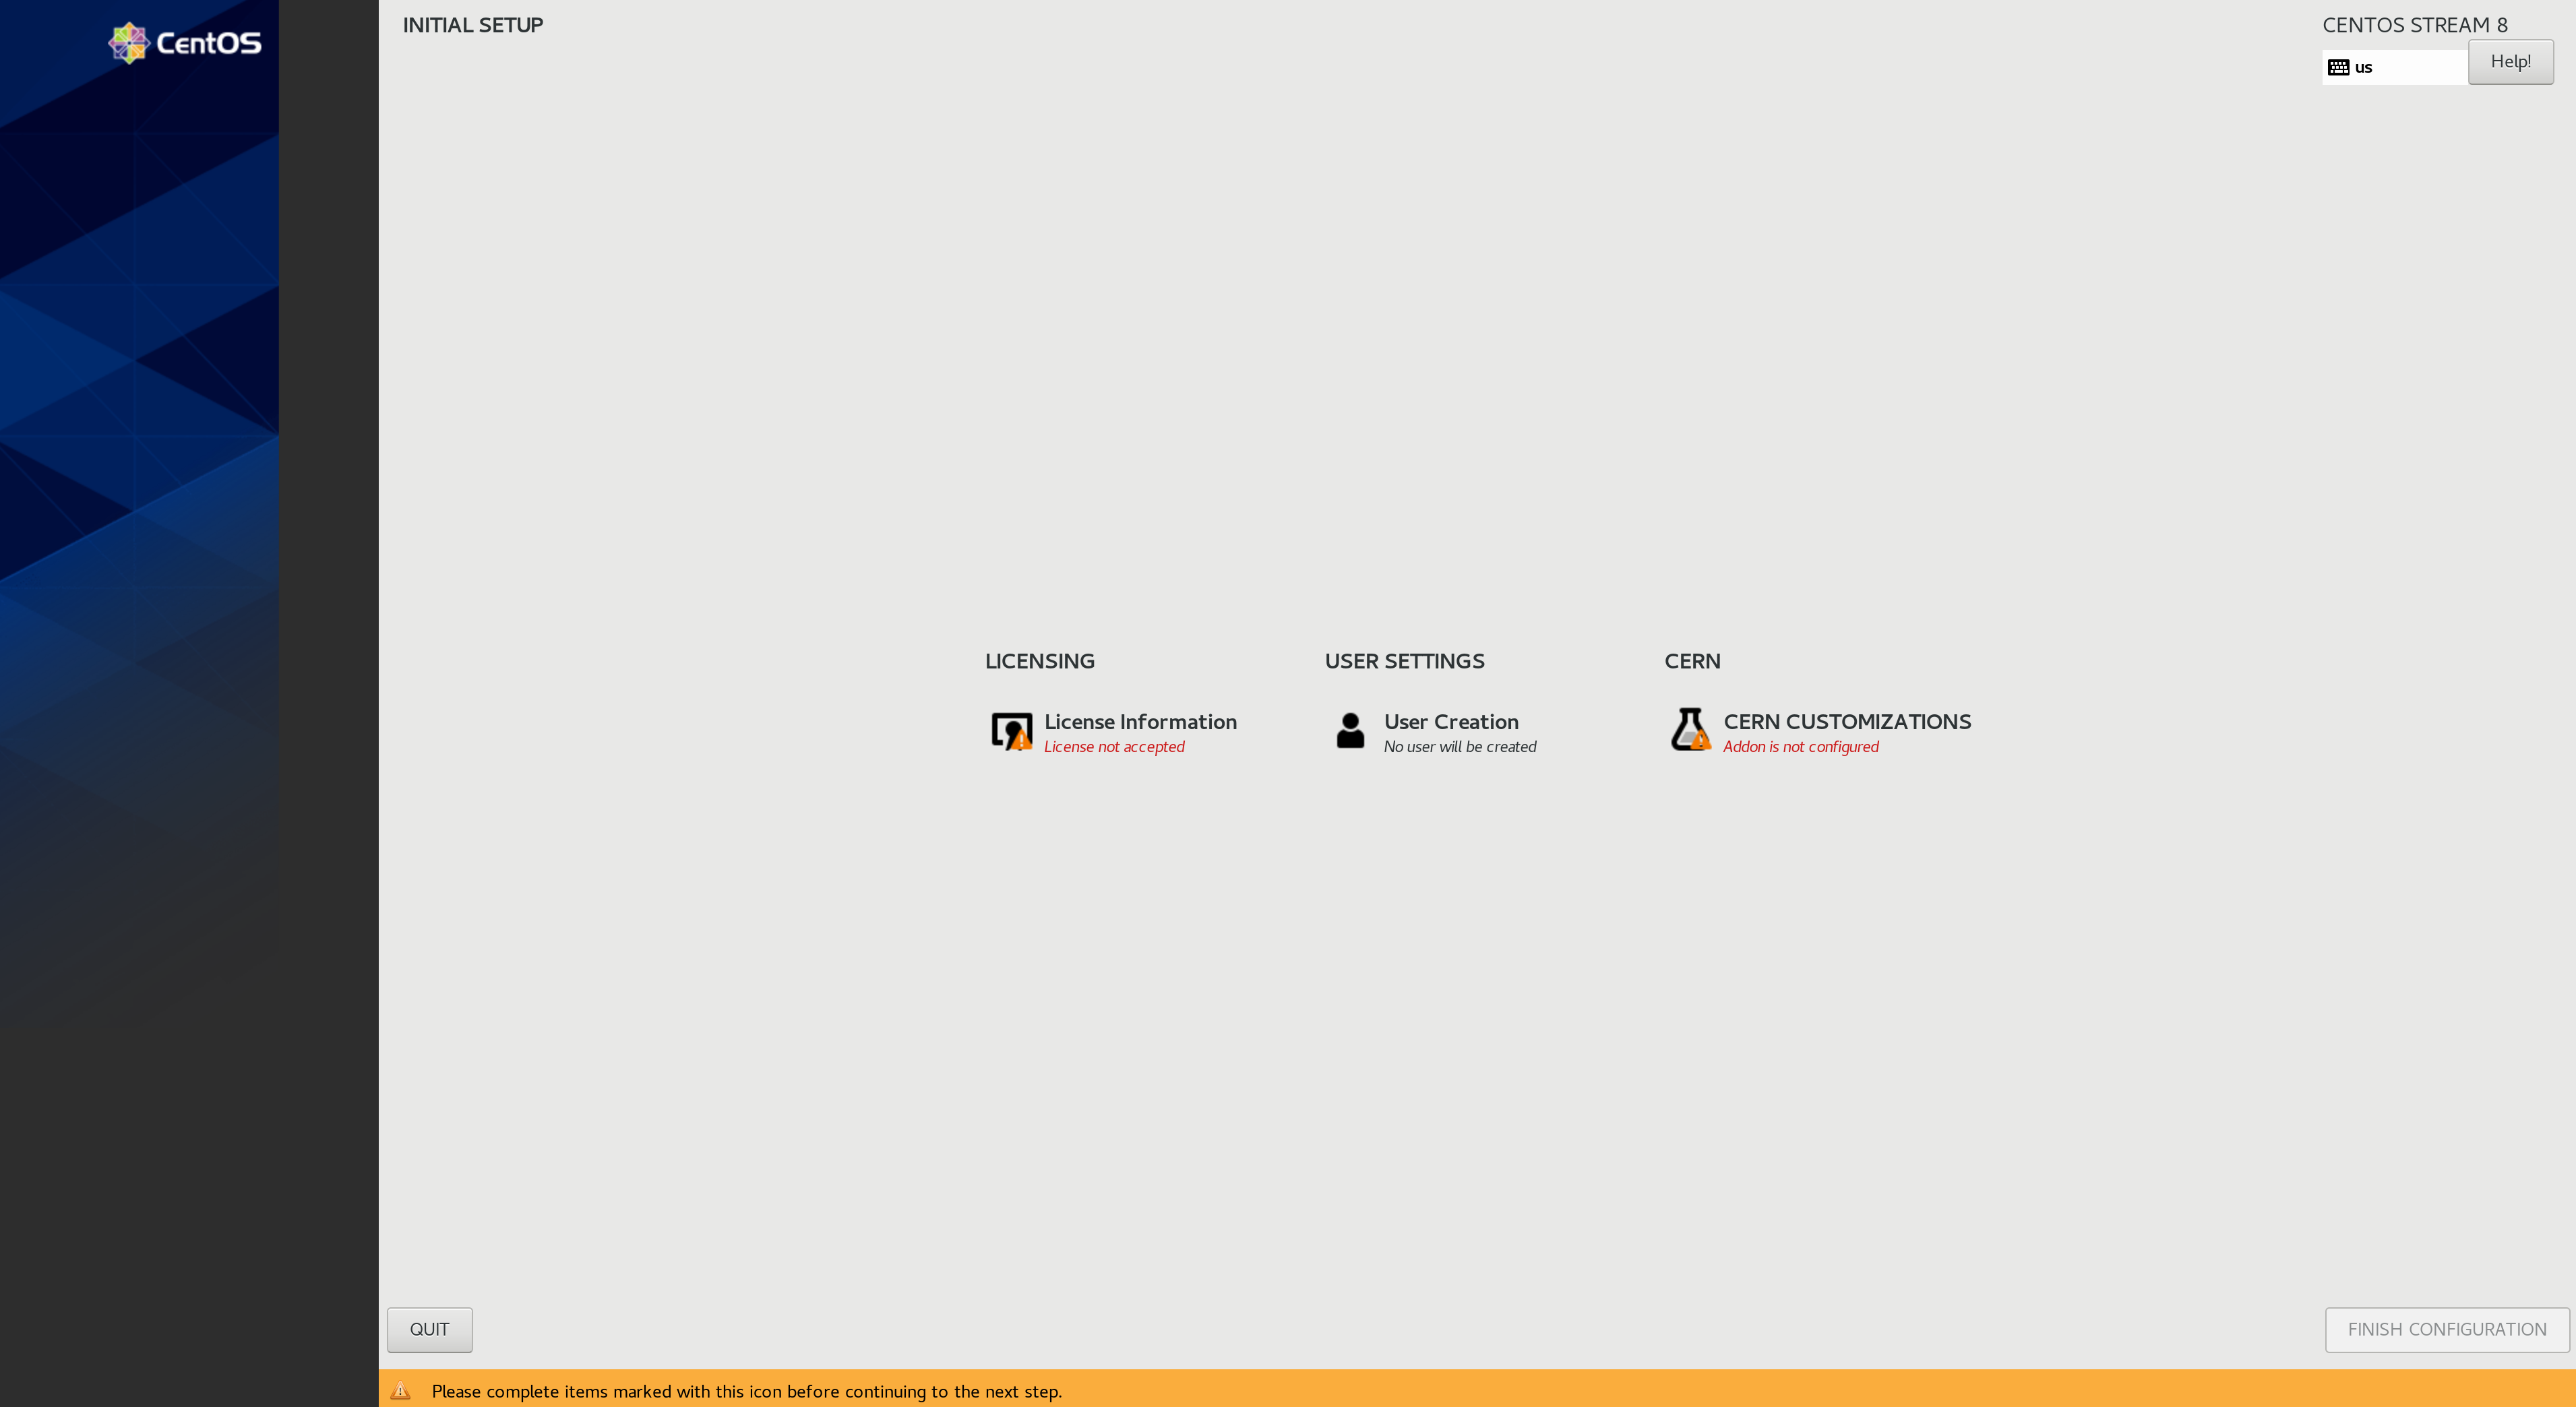
Upon clicking on 'CERN CUSTOMIZATIONS', you will be presented with the following options.
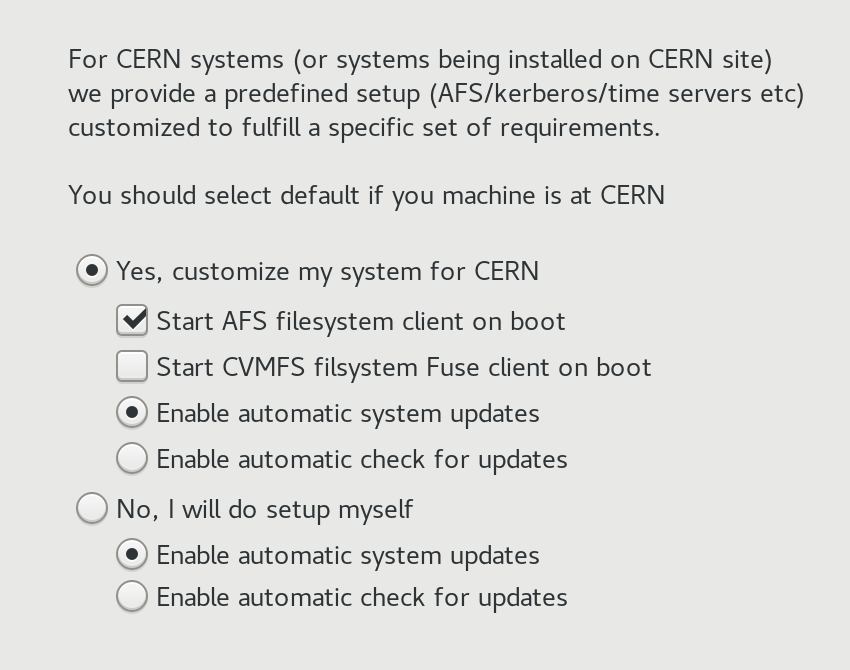
Depending on your choice, the locmap tool will be installed and invoked to create user accounts, provide root access, add printers, ... using information based on the ownership of device (network.cern.ch)
Manual post-install configuration adjustment
If you have selected not to run X graphical environment on your machine, or you have not installed your system with the 'Software Development Workstation (CERN Recommended Setup)' but wish to profit from the locmap tool to perform site specific configurations, here are some small recipes:
- First become root by either logging in as root, or using sudo
-
Run
sudo su - -
To configure automatic system updates
-
Run
dnf install dnf-autoupdate -
Install Locmap (the tool used to define CERN specific configuration)
- Run
dnf install locmap-release -
Run
dnf install locmap -
Apply CERN site configuration defaults (full configuration)
- Run
locmap --enable all -
Run
locmap --configure all -
Install AFS client (only):
- Run
locmap --enable afs - Run
locmap --enable kerberos -
Run
locmap --configure all -
Configure CVMFS (only)
- Run
locmap --enable cvmfs - Run
locmap --configure all
You can also use /usr/bin/locmap --list to check all the available puppet modules with their current state.
Applying software updates
You should update your system immediately after its installation: Eventual security errata and bug fixes will be applied this way before you start using it.
As root run:
/usr/bin/dnf -y update
to apply all available updates.